These crispy coconut flour waffles are light and crispy, made with coconut flour and sweetened with a little maple syrup. This waffle recipe is paleo friendly, gluten free, dairy free and nut free.

I don't think I've ever purchased a frozen waffle. Yes, my parents bought them when I was a child, but I have never personally purchased a box. In fact, I tend to steer clear of pre-packaged frozen foods unless I'm really not in the mood to cook.
I find making my own waffles, like these crispy coconut flour waffles, not only easy but satisfying and much healthier.
I love experimenting with different waffle flavors, everything from sweet to savory, chocolate to vanilla.
These paleo coconut flour waffles are one of my family's favorites!
Why You'll Love these Coconut Flour Waffles
- gluten free and grain free - made with a combination of coconut flour and tapioca starch
- dairy free - don't contain any milk or butter
- nut free - great for those with nut allergies
- refined sugar free - sweetened with a little maple syrup
- crispy - if you like a crisp waffle, then these are a must

Ingredients
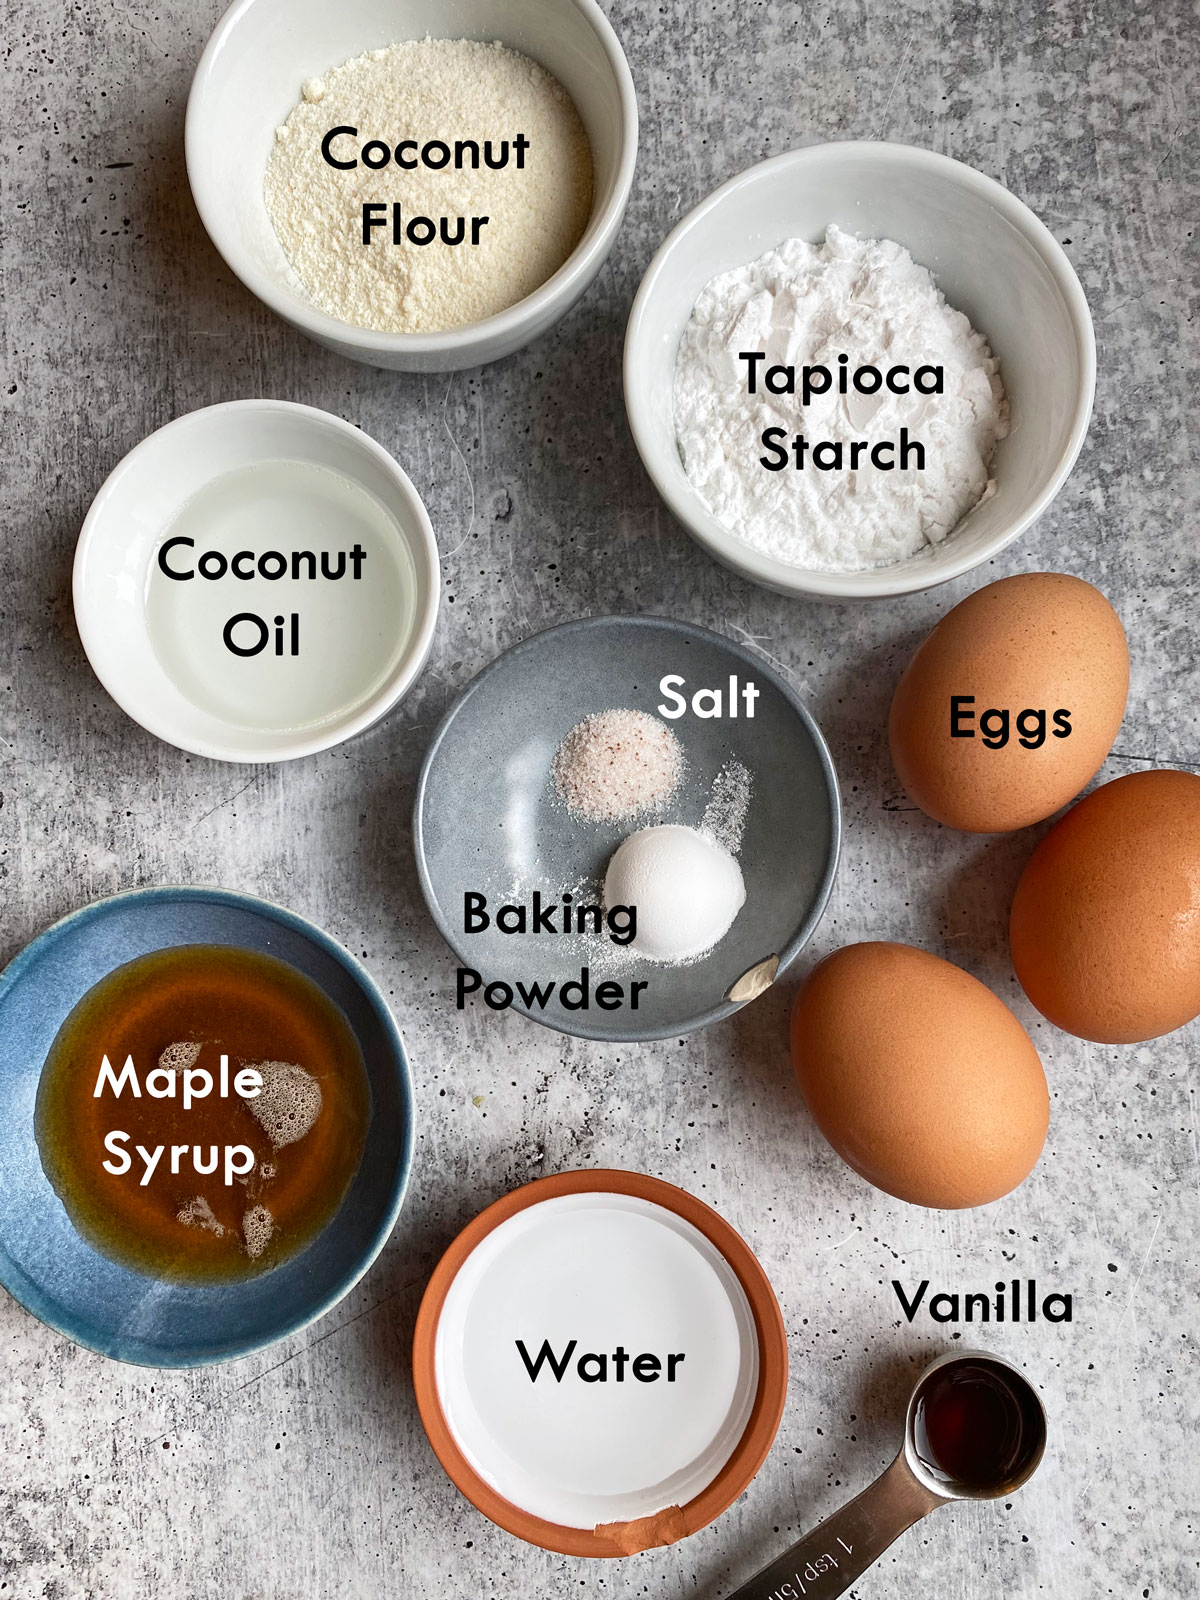
Here's a list of what you need to make these gluten free coconut flour waffles:
- large eggs
- coconut oil
- maple syrup
- water
- vanilla
- coconut flour
- tapioca starch
- baking powder
- salt

How to Make Waffles with Coconut Flour
While these waffles can be made by simply whisking the wet ingredients, adding in the dry and then cooking them, I find it important to add a couple extra steps in order to get crispy waffles. Here's what you need to do:
First, place a wire cooling rack in your oven and preheat the oven to 300 degrees F. Plug in the waffle iron.
Next, separate the egg whites from the yolks (don't discard either as you'll need both). Whisk the egg whites to soft peaks. I recommend an electric whisk to do this.
In a medium-sized mixing bowl, combine the egg yolks, coconut oil, maple syrup, water and vanilla. Mix in the coconut flour, tapioca starch, baking powder and salt.
Lastly, fold the egg whites into the batter.


Scoop the waffle batter onto the preheated waffle iron. I used a miniature waffle iron and used about 2 rounded tablespoons of batter per waffle, making 7 waffles.
Cook the waffles a little longer than normal, until they are golden brown. Once cooked, remove the waffle from the waffle iron and place it on the wire cooling rack in the oven.
The waffles are best left in the oven for 8-10 minutes to crisp.
Serve warm and with your favorite toppings!


Best Coconut Flour Waffle Toppings
My favorite sweet waffle toppings include:
- roasted coconut butter
- maple syrup or honey
- nut butter
- homemade sunflower seed butter
- melted chocolate
- nuts and seeds
- fruit - fresh, frozen or dried
- dairy free yogurt or cream cheese
Frequently Asked Questions
Yes, tapioca starch is necessary for getting the right waffle texture. It makes the waffles more crisp, without comprising flavor. The best swaps would be arrowroot starch or potato starch.
No, this step is optional, just helps to create a crispier texture. You can simply whisk all the wet ingredients, then mix in the dry ingredients to make these waffles.
No, this recipe requires eggs.
More Recipes Using Coconut Flour
Print
Crispy Coconut Flour Waffles (Paleo)
- Prep Time: 10 minutes
- Cook Time: 30 minutes
- Total Time: 40 minutes
- Yield: 7-8 miniature waffles 1x
Description
These crispy coconut flour waffles are light, crispy and great for a sweet breakfast. They're paleo friendly, gluten free and dairy free.
Ingredients
- 3 large eggs
- 3 Tbsp melted coconut oil
- 2 Tbsp maple syrup
- 2 Tbsp water
- 1 tsp vanilla extract
- ¼ cup coconut flour (27g)
- ¼ cup tapioca starch (32g)
- 1 tsp baking powder
- ¼ tsp salt
Instructions
- Set a wire cooling rack in your oven and preheat the oven to 300 degrees F. Plug in your waffle iron to preheat.
- Separate the egg whites from the egg yolks*
- Using an electric whisk, whisk the egg whites to soft peaks, set aside.
- In a medium-sized mixing bowl, combine the egg yolks, coconut oil, maple syrup, water and vanilla.
- Add in the coconut flour, tapioca starch, baking powder and salt and whisk until smooth (the batter will thicken quite a bit).
- Fold the egg whites into the batter using a spatula or wooden spoon.
- Scoop the batter onto the waffle iron and cook until golden brown (you'll want to cook the waffles a little longer than normal).
- Remove the cooked waffle and place it the preheated oven to crisp while you cook the remaining waffles. I recommend letting each waffle bake in the oven for at least 8 minutes to get extra crisp.
- Repeat steps 7-8 until all the batter has been used up.
Notes
*Separating the whites from the yolks and whisking the egg whites helps crisp up the waffles, but is not required. You can make delicious coconut flour waffles by omitting this step, they just won't be quite as crisp.


mistimaan says
Nice and yum recipe 🙂
Cathryn says
Yum!
Kelly says
Hi!!! Can you invent a recipe for my darling husband who is on and AIP diet for Leaky Gut?He can have coconut flour, but not egg or sweeteners- real or fake
Thanks!!!
Katie says
I can definitely put that on my to-do list! It's quite challenging to create coconut flour recipes without eggs, but I'll see what I can do 🙂
kelly says
Thank you!!!!
Katie says
My family and I love these coconut flour waffles. Enjoy!
Cori says
These are great! I see you used a waffle maker that looks like Eggos - we had the Dash one but it just clicked for me that it's teflon based...did you happen to find one that isn't???
Katie says
I use the Dash one too - haven't found one without the non-stick coating.
arosewellness says
Amazing recipe!!!! I even skipped steps and they still came out perfect! Once a month my little brother comes over for breakfast and he always requests these, so good!
Katie says
So glad they worked for you! Thank you for leaving a review 🙂
Jonathan Irvine says
Best waffle recipe without wheat flour ive tried. I have a full size waffle maker and this recipe made 2 waffles. Perfect, in my opinion, for one waffle loving, 1/4 cup of maple syrup per waffle using, human such as myself. The oven step is a major level up for a crispy experience.
Katie says
I'm so glad you liked them 🙂 And yes, the oven is such a crucial step for crispness!