These collagen brownies are rich and fudgy with a dark chocolate flavor. They're made with almond flour, collagen peptides and dark chocolate; making them gluten free and paleo friendly.
While I love my collagen brownie bites for a sweet snack, these collagen brownies have quickly become my favorite dessert. They have a thick, fudgy texture - somewhere between a brownie and fudge. And they aren't too sweet, which is perfect if you love rich chocolate desserts (like I do).
These paleo collagen brownies are made with collagen peptides, almond flour and sweetened with coconut sugar. They only require 8 ingredients and bake in just 20 minutes! Super easy!
Why You'll Love these Collagen Brownies
- paleo and gluten free - made with almond flour and a few other simple, wholesome ingredients.
- protein packed - these brownies are great if you're looking for a dessert that's higher in protein, as they contain collagen peptides.
- rich and fudgy - perfect for anyone that's a fan of dark chocolate and likes a fudgy, rather than cakey brownie.
- only 8 ingredients - made with just a few simple ingredients that you probably already have stocked in your pantry.
Ingredients
The full recipe for these collagen brownies can be found in the recipe card below, but here's an overview of the ingredients you'll need:
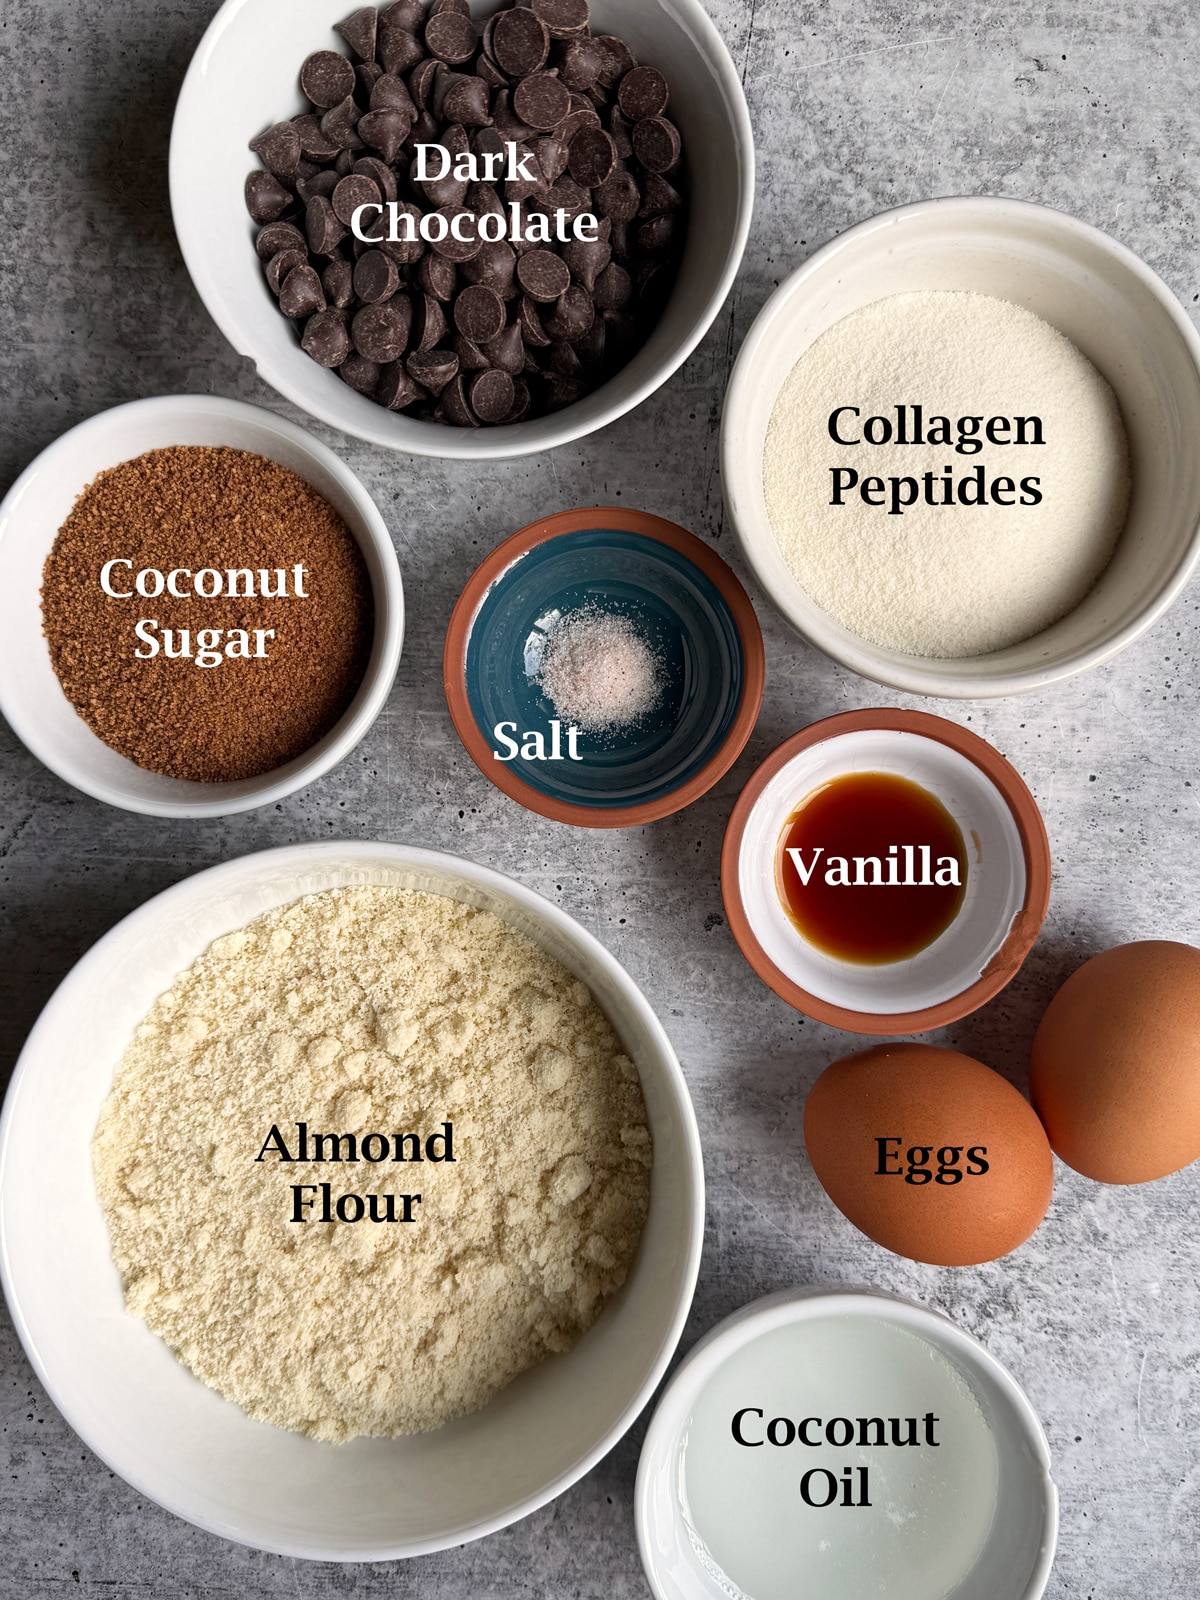
- dark chocolate - I used 85% dark chocolate chips, but recommend any dark chocolate with a cocoa content between 60-85% dark. If you're strict paleo, then I recommend using Hu chocolate gems since they're refined sugar free.
- eggs - you'll need 2 large eggs for this recipe. An egg substitute has not been tested.
- coconut sugar - to sweeten the brownies. For a low carb option, swap the coconut sugar for a granulated sugar free sweetener (like monk fruit sweetener).
- coconut oil - for texture
- vanilla extract - for flavor
- almond flour - I recommend using blanched almond flour. If you need these brownies to be nut free, then swap the almond flour for tigernut flour.
- collagen peptides - since these are collagen brownies. I used unflavored collagen, but a chocolate or vanilla flavor would work well too.
- salt - brings out more flavor
How to Make Collagen Brownies
To make these brownies, you'll need 2 mixing bowls (one for dry ingredients and one for wet) and a microwaveable dish to melt the dark chocolate, a whisk, spatula and a lined 8x8 inch baking dish. Here are the steps:
- First, preheat your oven to 350 degrees F. Line an 8x8 inch baking dish with parchment paper.
- Melt the dark chocolate in a small, microwaveable bowl.
- In a large mixing bowl, combine the dry brownie ingredients.
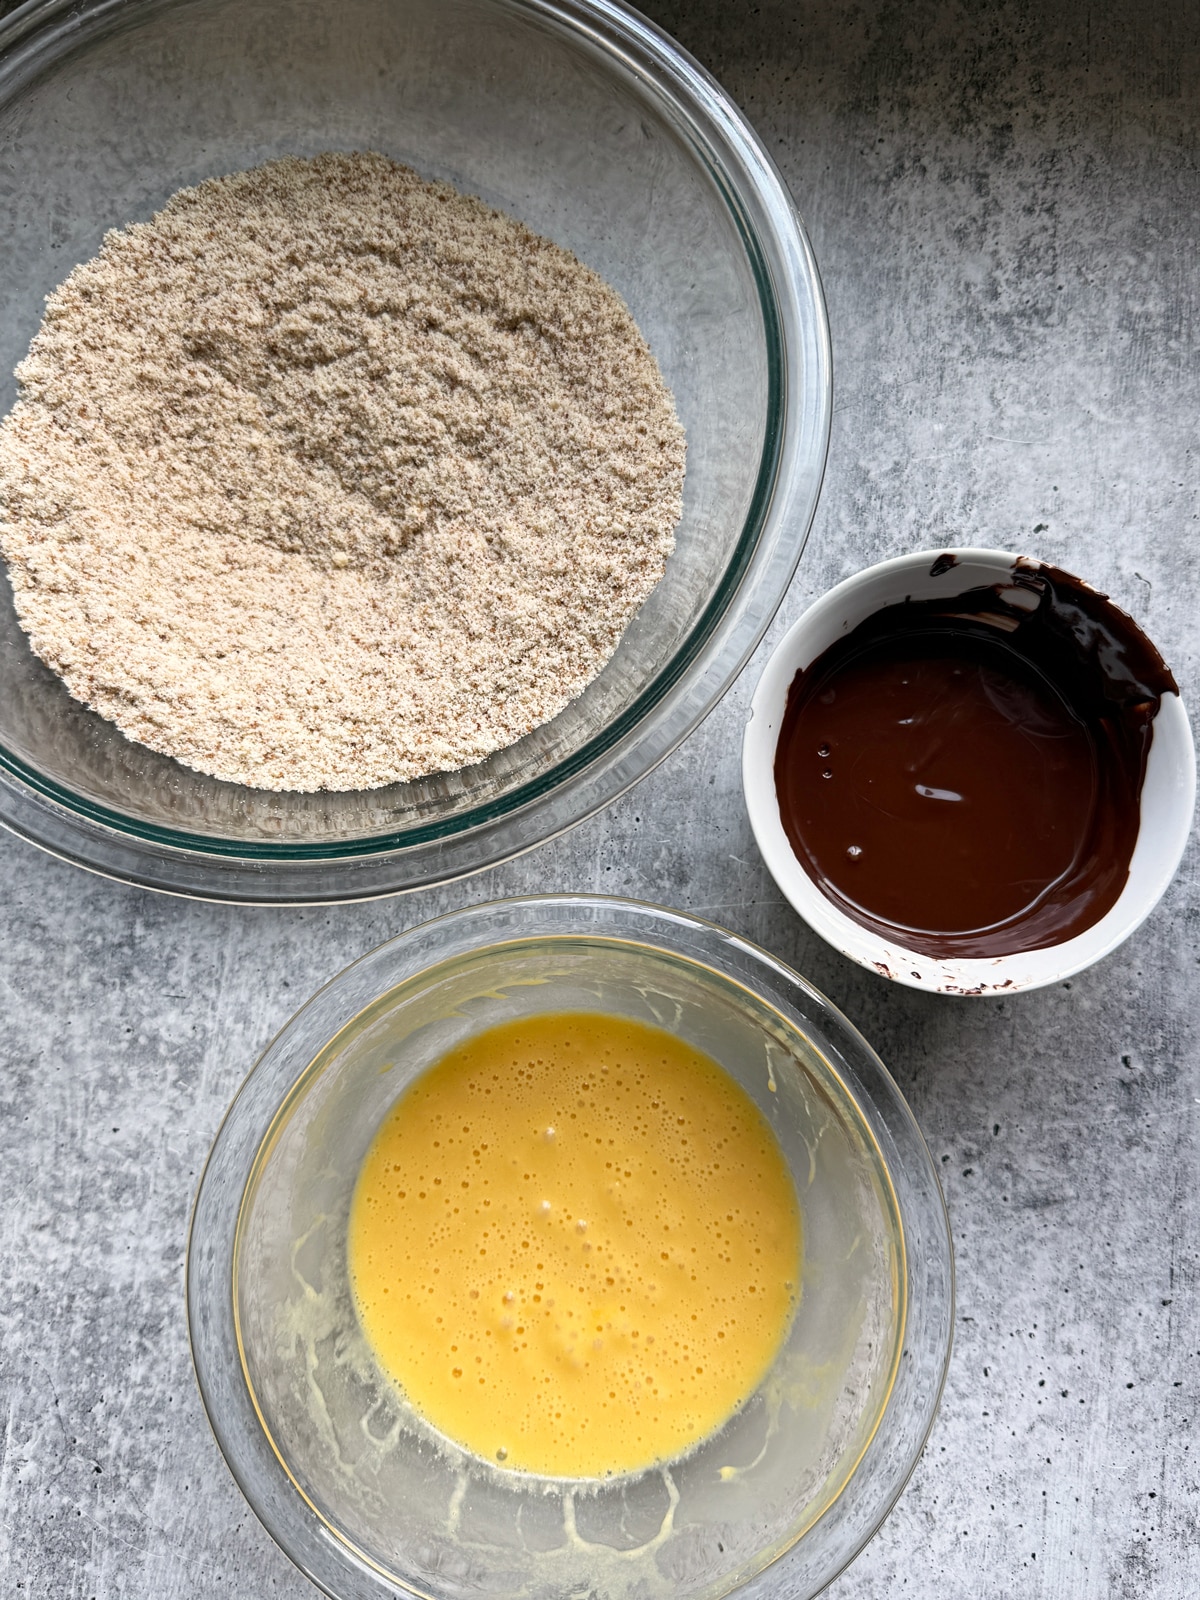
- In a smaller mixing bowl, combine the wet brownie ingredients.
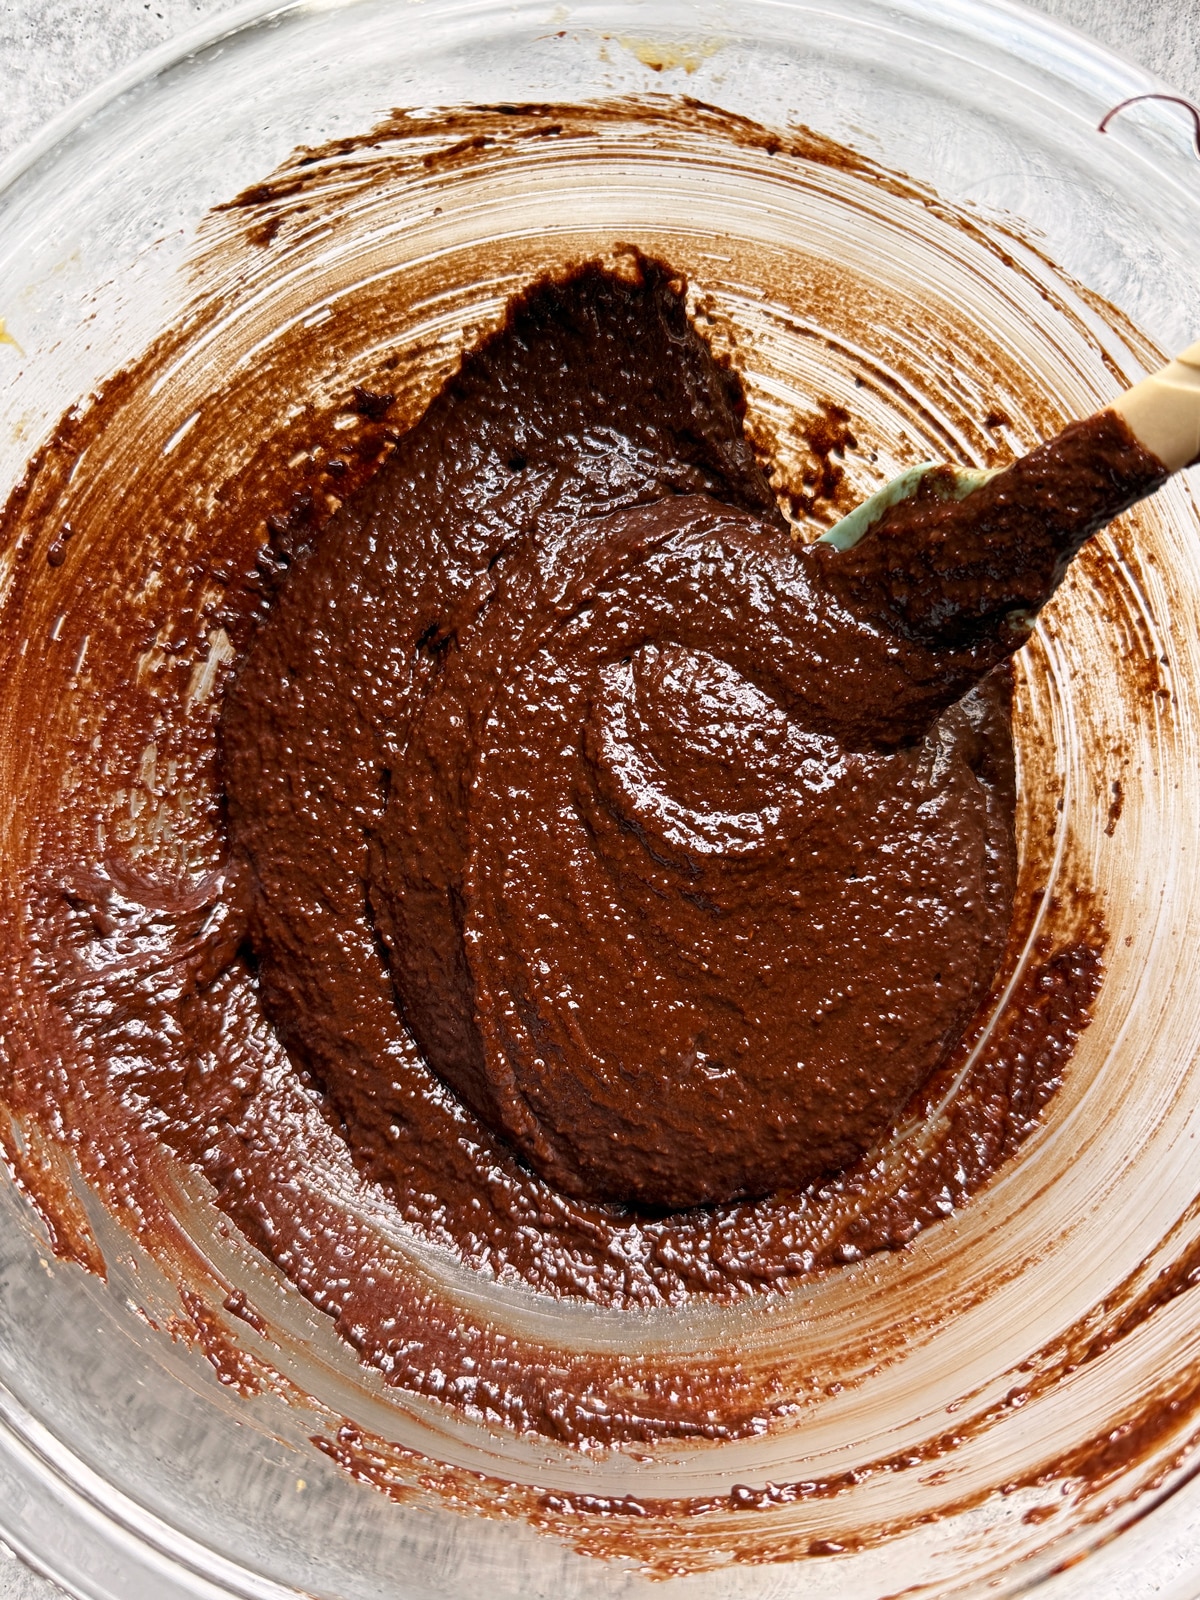
- Pour the wet ingredients into the dry and mix with a spatula until well combined. Then fold in the melted chocolate.
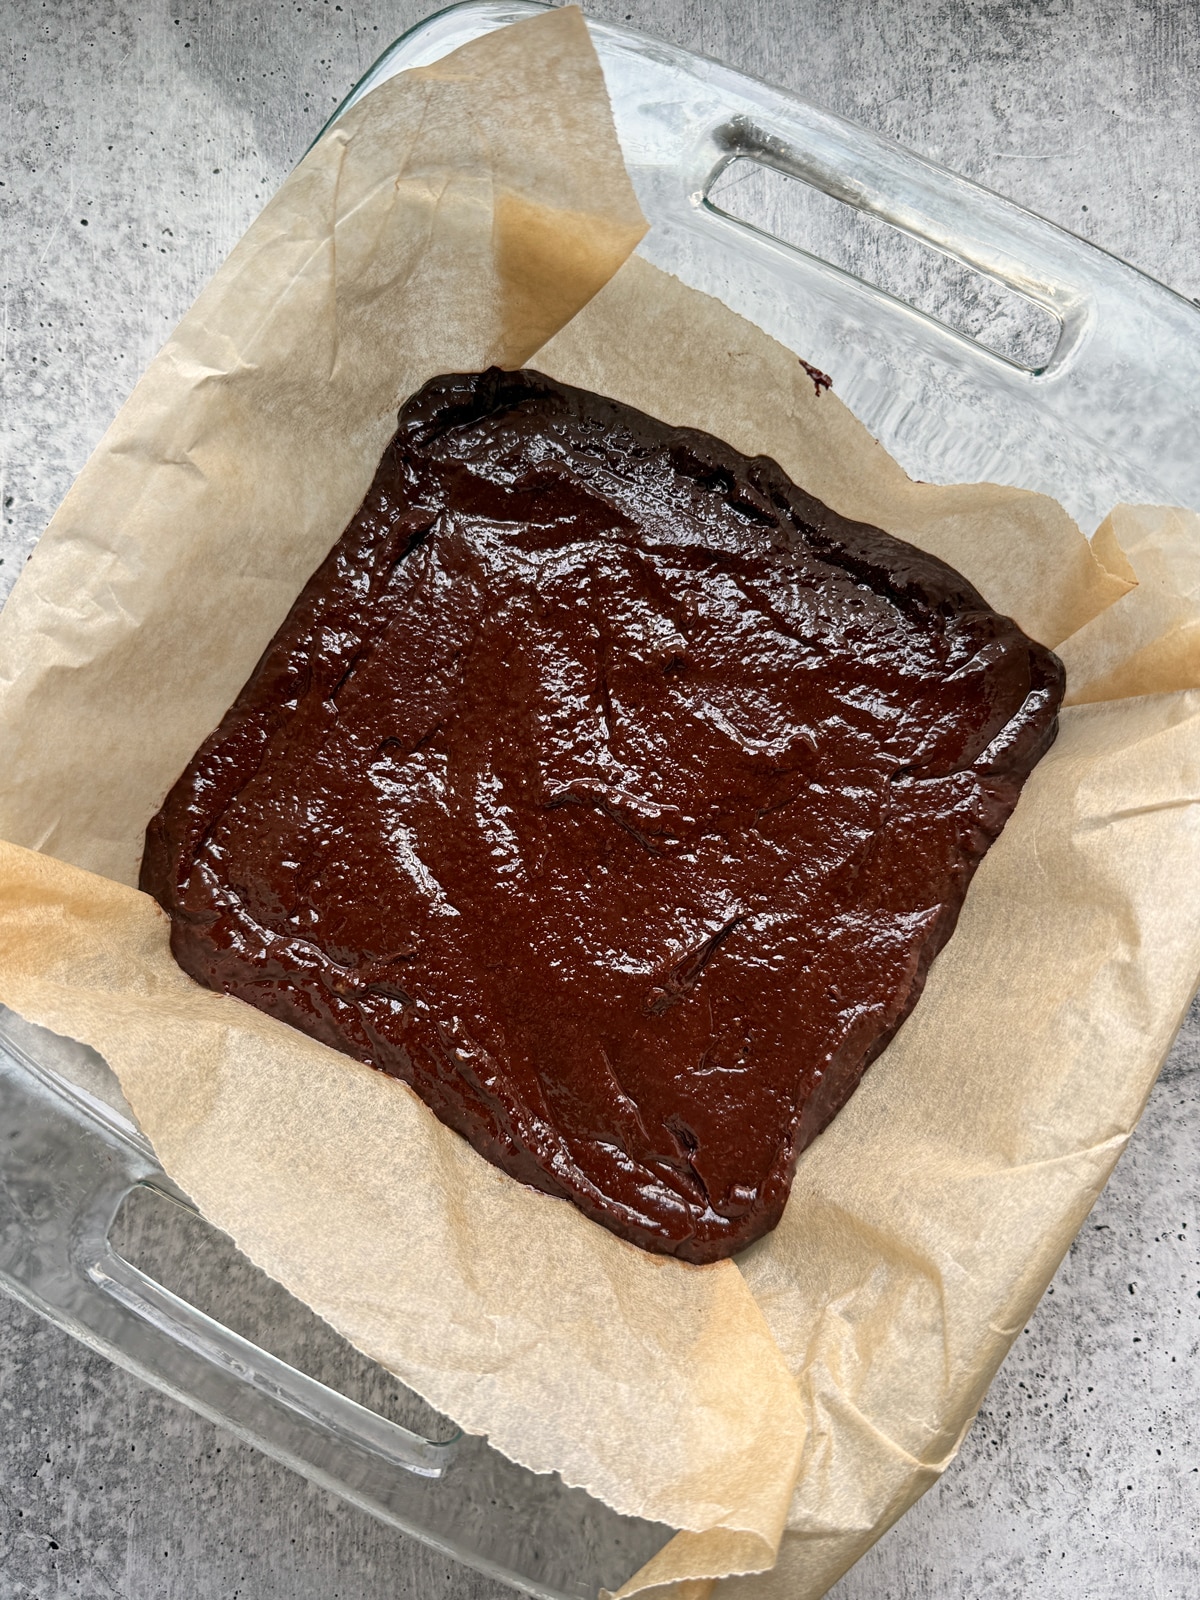
- Pour the brownie batter into your lined baking dish (it is thick).
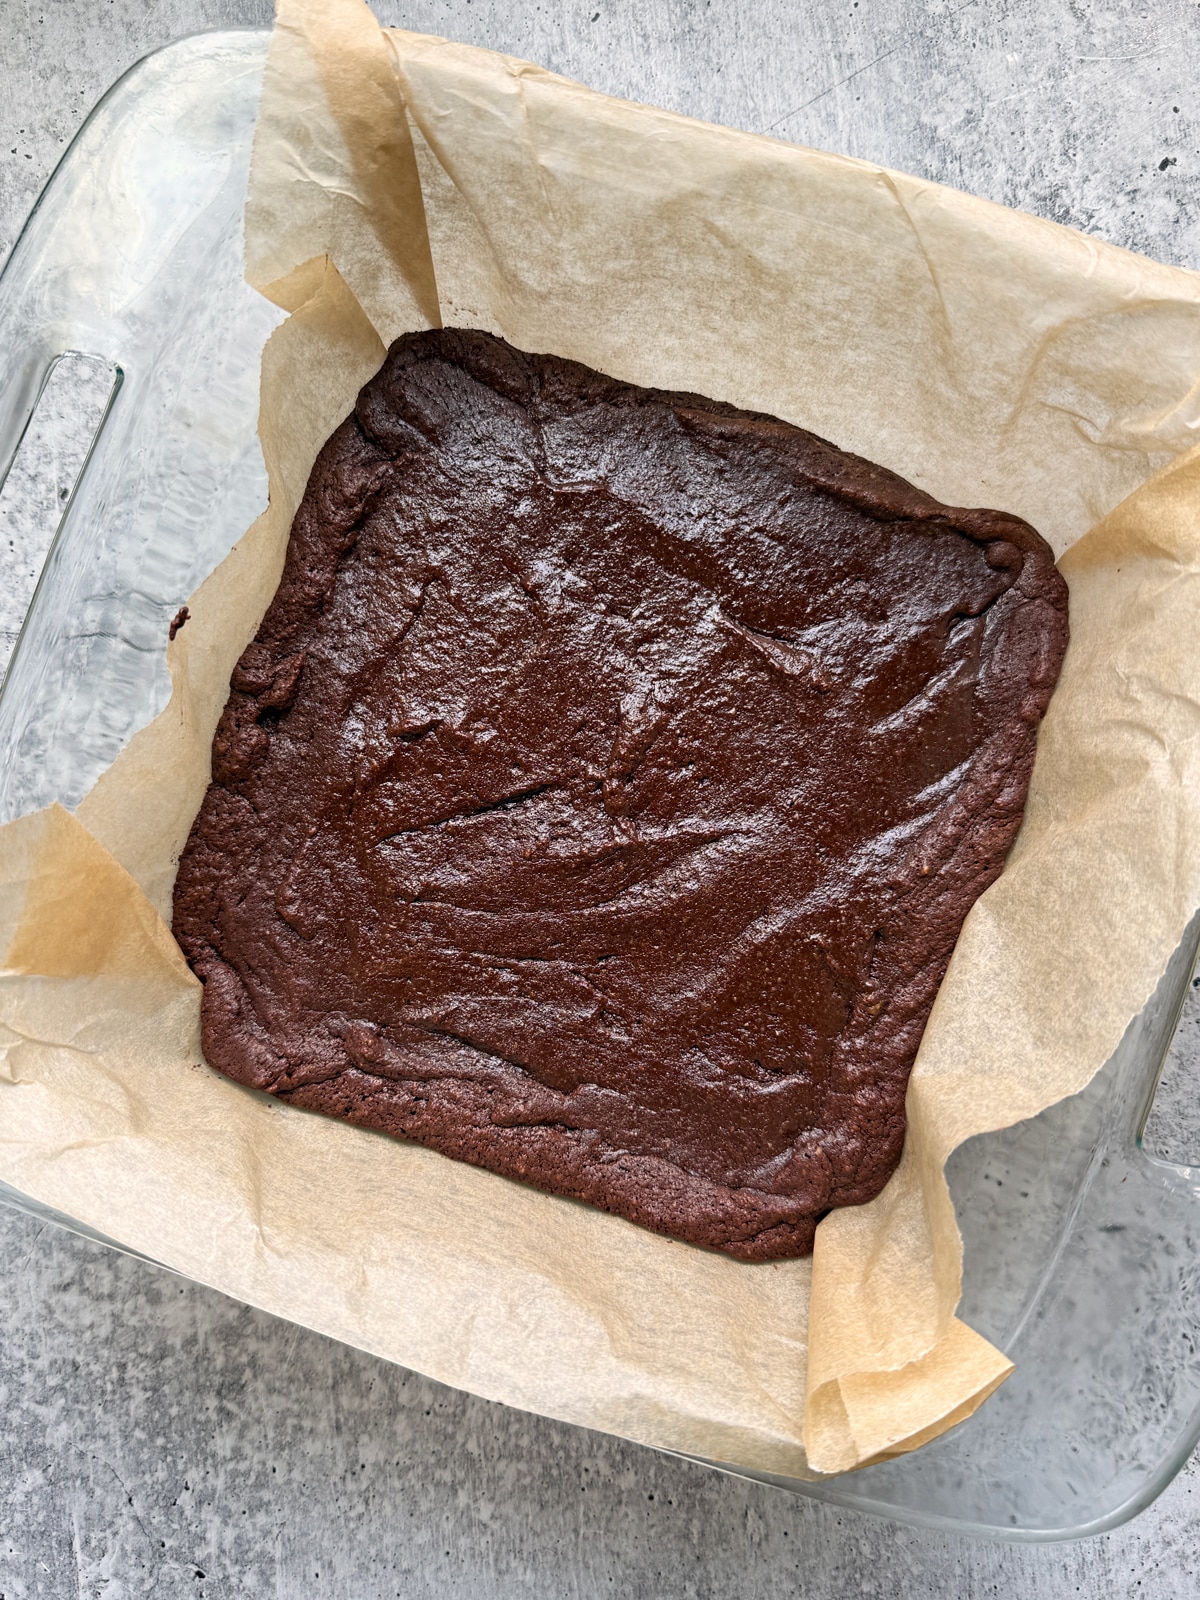
- Place the brownies in your oven and bake at 350 degrees F for 20 minutes.
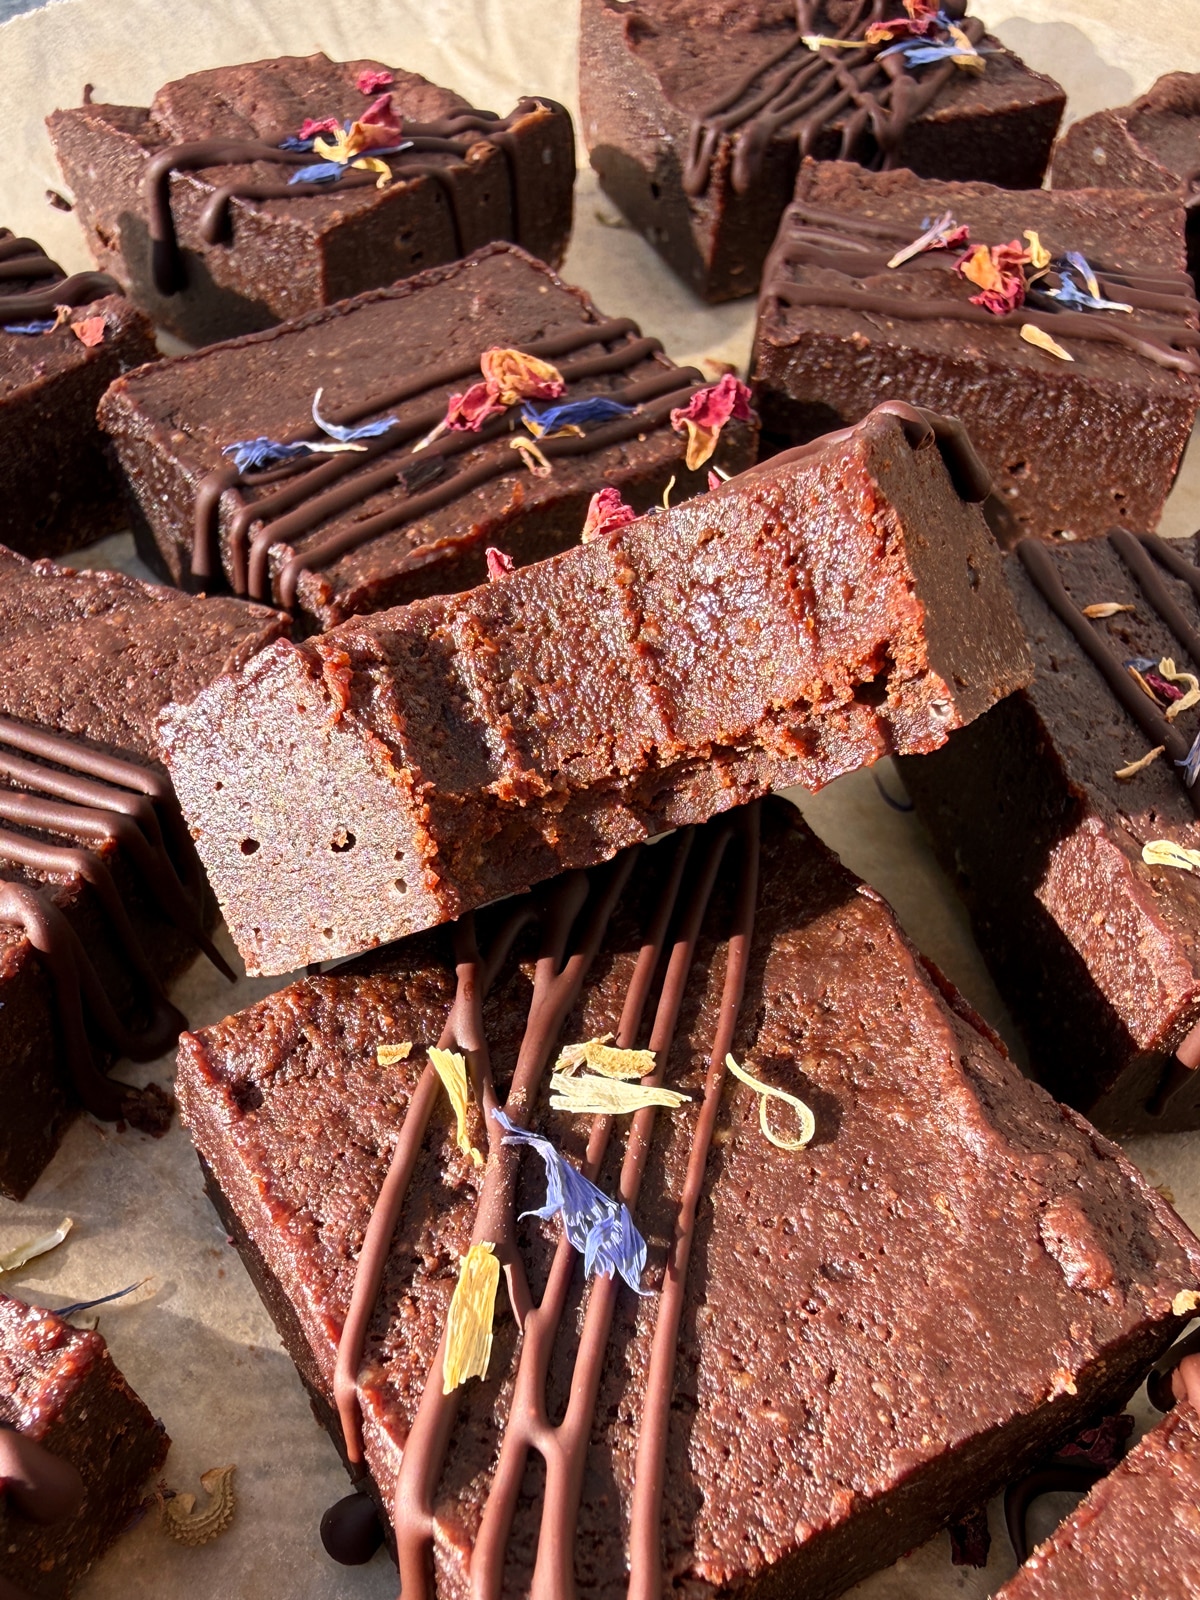
- After baking, let the brownies cool to room temperature in the baking dish, as they will continue to set. I actually prefer storing them in the fridge overnight before cutting them. They get extra fudgy in the fridge and cut better.
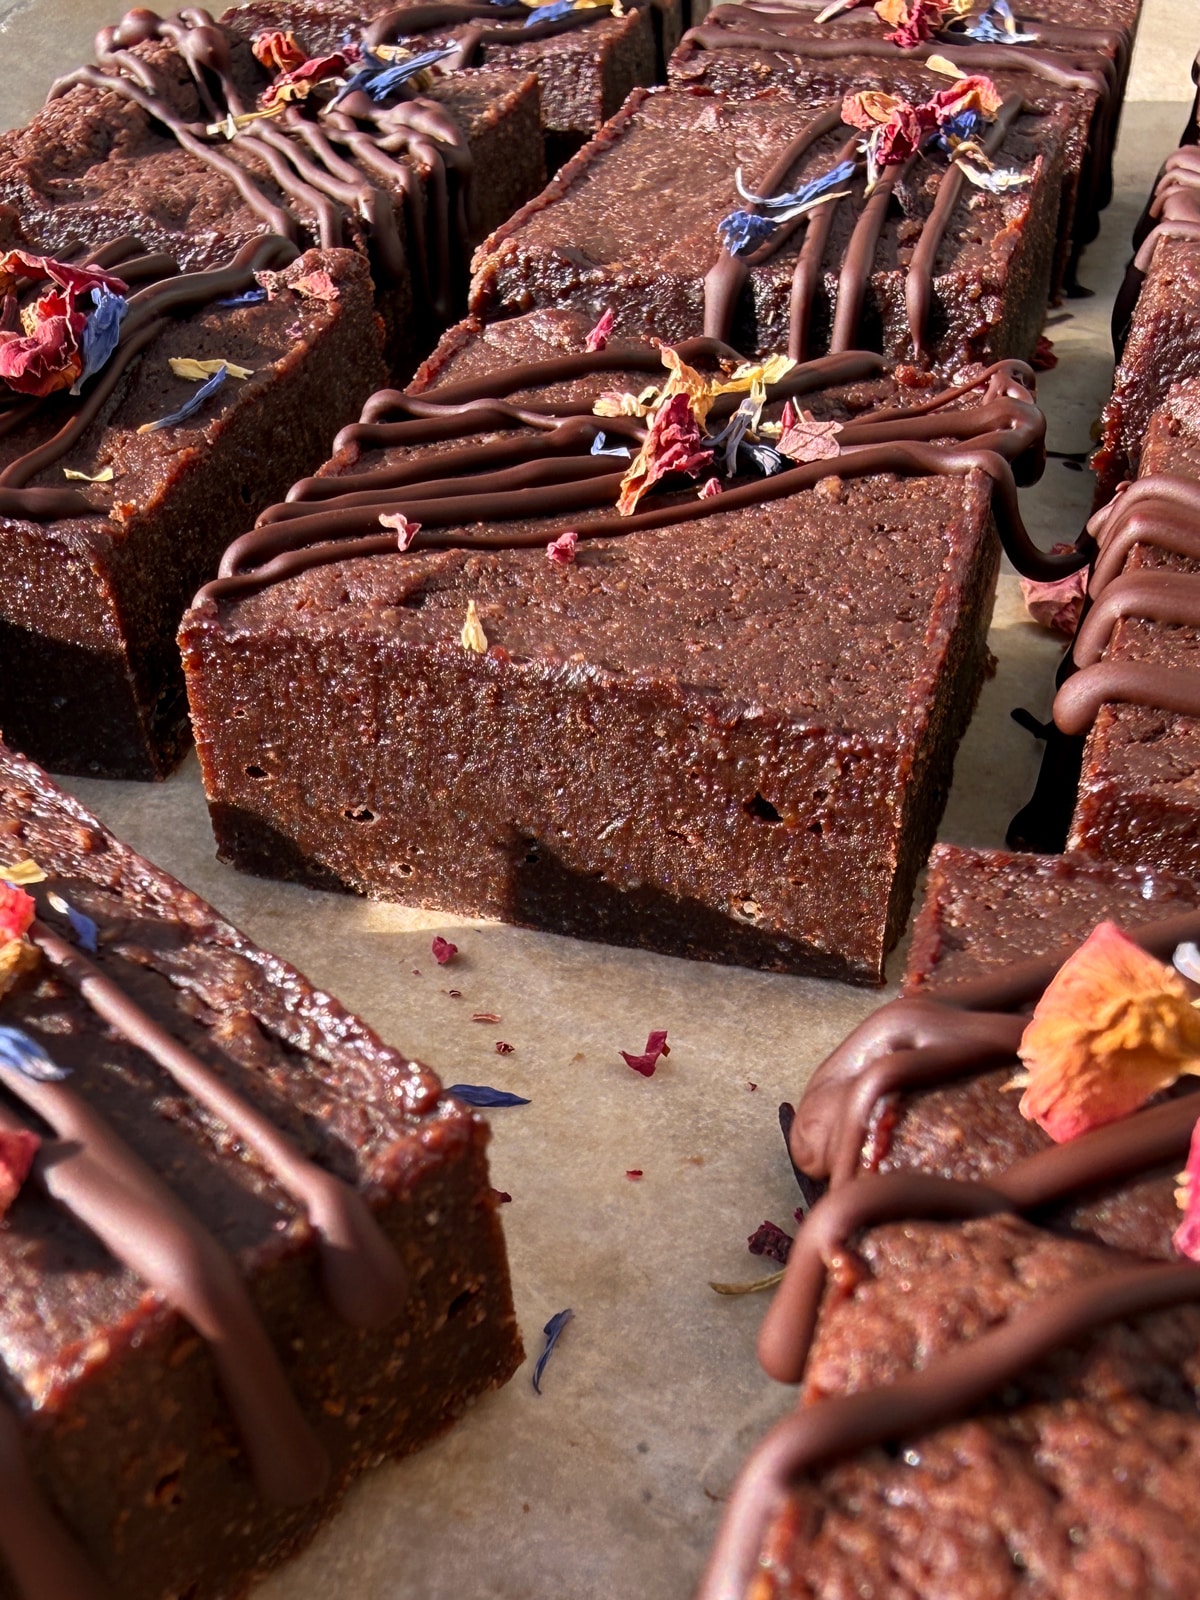
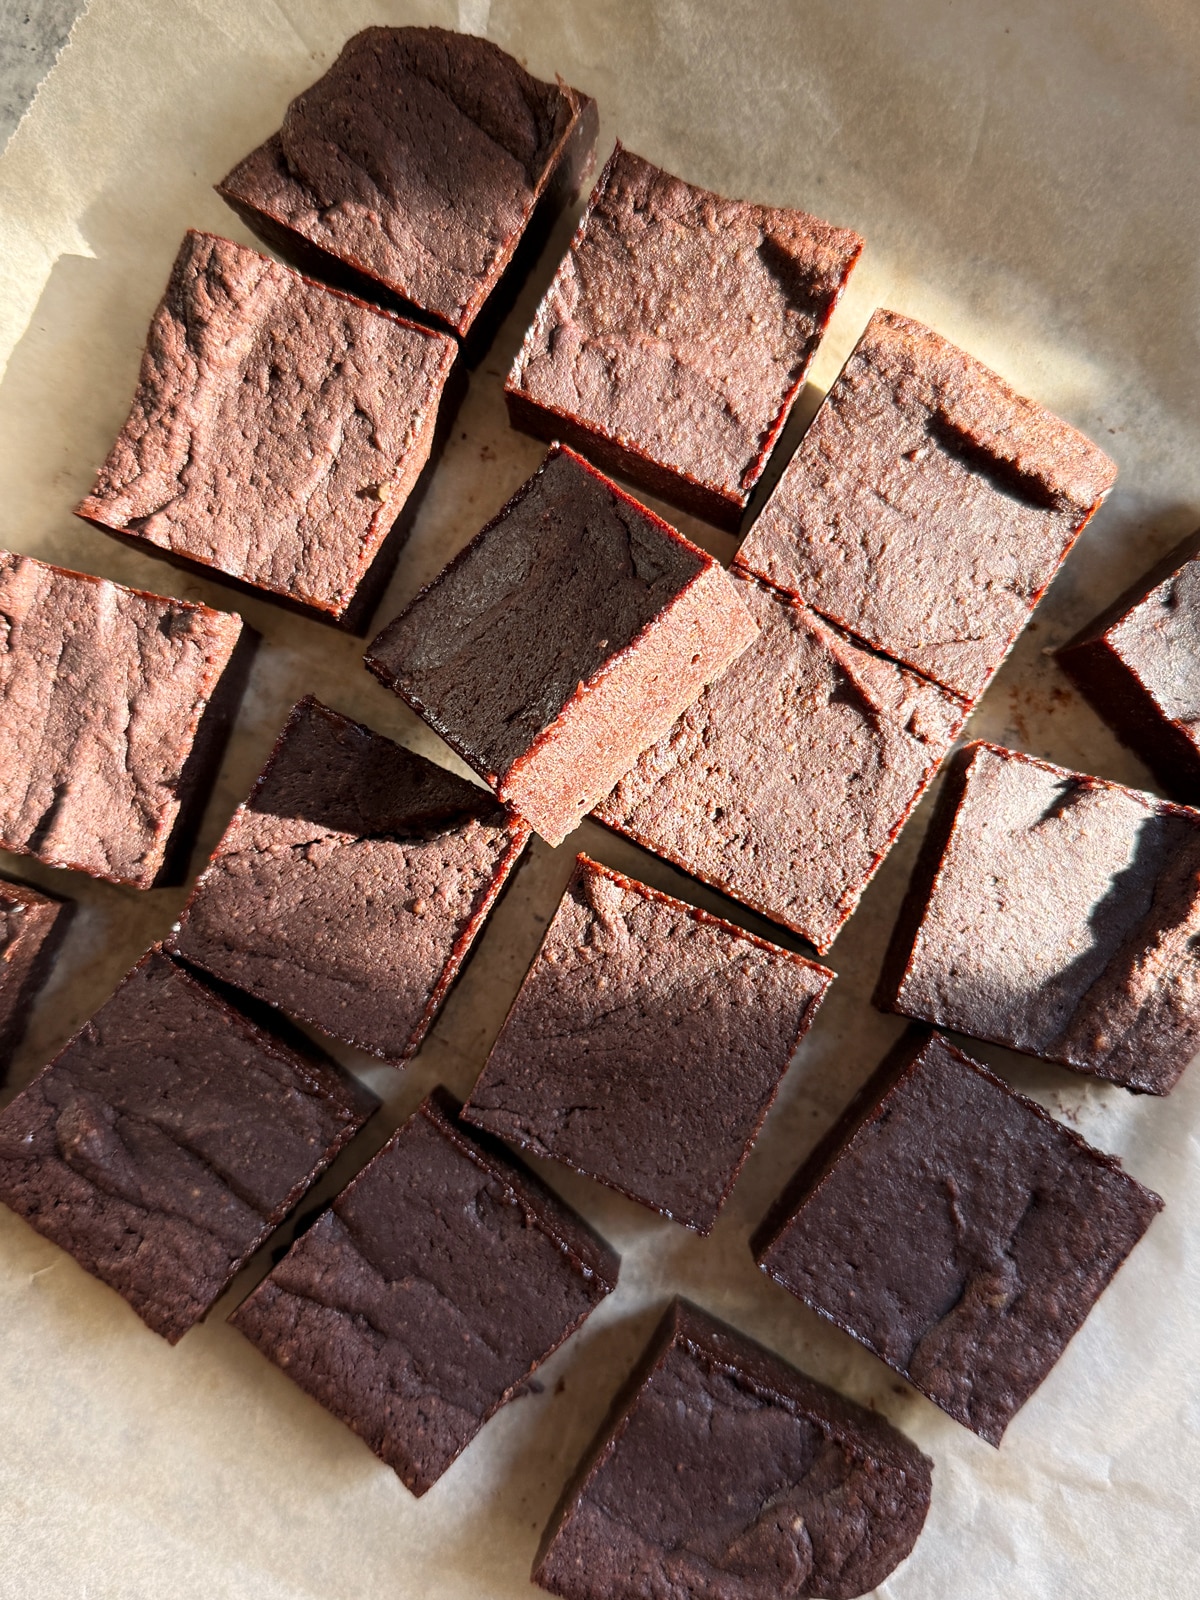
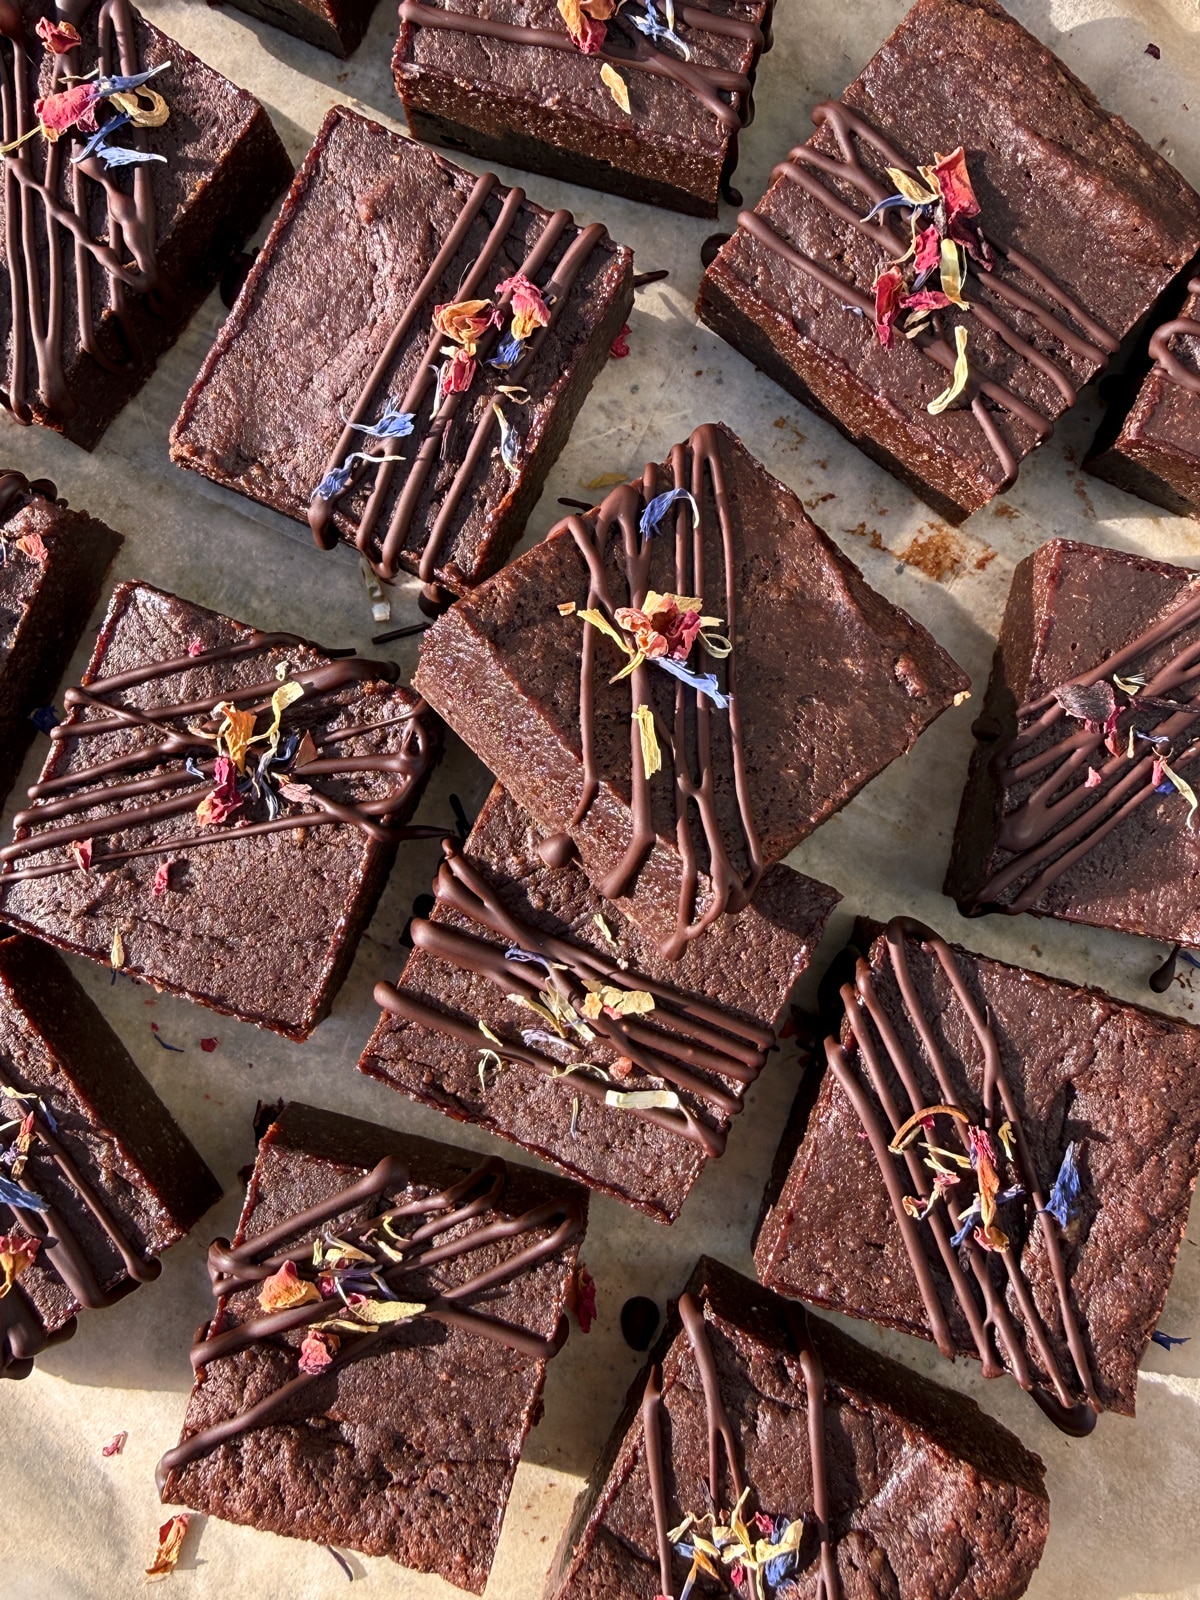
- After cutting the brownies, enjoy as is or decorate them to your liking. I drizzled dark chocolate over the brownies and then added a pinch of dried edible flowers.
Tips and Tricks
- Measure ingredients by weight - the almond flour and collagen measurements are given in cups and grams. For best results, I recommend measuring in grams using a small kitchen scale. This just ensures accuracy, since the way people measure can vary and even ingredient textures can differ.
- Use a dark chocolate - dark chocolate works best for these brownies. I recommend a dark chocolate with a cocoa content between 60-85% dark. The lower the cocoa content, the sweeter the brownies will be.
- Mix batter quickly - the brownie batter does thicken quickly, especially after adding the dark chocolate. Work quickly when making the batter so that it is easier to work with.
- Don't overmix the batter - when combining the wet and dry ingredients, don't overmix. You want everything to be just combined. And the same goes for when you mix in the melted chocolate.
Storage
These brownies can be kept at room temperature for a couple days, but honestly I like them best stored in the fridge. They have the perfect texture right from the fridge - extra fudgy!
Place these brownies in an airtight container or keep them covered in the 8x8 inch baking dish. They're best eaten within 2 weeks if stored in the fridge. For longer term storage, place them in an airtight baggie and keep them in the freezer up to 3 months.
FAQ
I have only tested these with Vital Proteins unflavored collagen peptides, but most brands should produce the same results. You can also use a chocolate or vanilla flavored collagen.
Yes! Simply swap the almond flour for tigernut flour.
Be sure to use an extra dark chocolate (85%) or a keto friendly chocolate and swap the coconut sugar for a sugar-free sweetener like monk fruit.
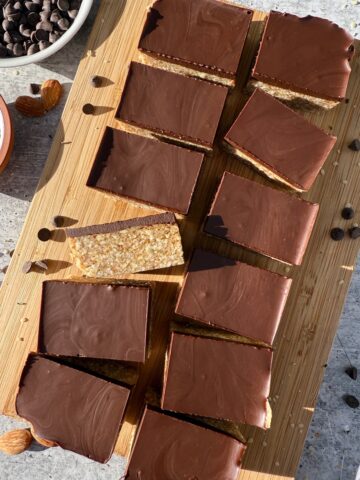
More Recipes Using Collagen Peptides
Looking for other recipes like this? Try these:


Collagen Brownies (Paleo, Gluten Free)
- Prep Time: 15 minutes
- Cook Time: 20 minutes
- Total Time: 35 minutes
- Yield: 8x8 inch pan 1x
Description
Rich, fudgy collagen brownies made with almond flour and collagen peptides.
Ingredients
- 1 cup dark chocolate chips (I used 85% dark)
- 1 cup almond flour (90g)
- ½ cup collagen peptides (40g)
- ¼ tsp salt
- 2 large eggs
- ⅓ cup coconut sugar
- ¼ cup coconut oil, melted
- 1 tsp vanilla extract
Instructions
- Preheat your oven to 350 degrees F. Line an 8x8 inch baking dish with parchment paper.
- Melt the dark chocolate. To do this, place your dark chocolate in a small, microwaveable bowl. Place it in the microwave and melt on high at 20-30 second intervals, stirring between.
- In a large mixing bowl, whisk together the almond flour, collagen peptides and salt.
- In a smaller mixing bowl, whisk together the eggs, coconut sugar, coconut oil and vanilla.
- Pour the wet mixture into the dry and mix with a spatula until well combined. Then fold in the melted chocolate. Do not overmix - mix until just combined.
- Pour the brownie batter into your lined baking dish (it is thick) and spread it out evenly to the sides.
- Place the brownies in your oven and bake at 350 degrees F for 20 minutes.
- After baking, let the brownies cool to room temperature in the baking dish, as they will continue to set. I actually prefer storing them in the fridge overnight (or for a few hours) before cutting them. They get extra fudgy in the fridge and are easier to cut.
- After cutting the brownies, enjoy as is or decorate them to your liking. I drizzled dark chocolate over my brownies and then added a pinch of dried edible flowers.

Katie
Hope you all love these as much as we do!
Elspeth
Hi Katie,
I was wondering what amount of dark chocolate chips to use. Looking forward to making the brownies!
Katie
Oh my! Thank you for asking - huge error on my part! You will need 1 cup chocolate chips 🙂